
There are two things you probably already know about me:
- I love to code.
- I always aim to keep everything in-house and flowing together.
These two things both came into play when I decided to start my own e-course. The easiest and quickest way to get this off the ground would be to use an existing service like CourseCraft. I had a few problems with “outsourcing” like this:
- My students may have to create a new account (like a coursecraft.net account). I don’t want them to have to juggle one account on creativewhim.com (for plugin/theme purchases and support) and another one on an external site like coursecraft.net (for the e-courses). It just gets confusing. I prefer to have ONE login system for all my customers that gives them their entire purchase history with me.
- I want to give students lifetime access to the e-course material. This then leads to two problems:
- What if the third-party site shuts down one day?? There go all my lessons!
- The students would probably remember they purchased the e-course through Creative Whim, but what if they forget the coursecraft.net URL?
- The payments wouldn’t sync up to my accounting system. It’s so much easier to be able to see all my earnings in one place. I already have my creativewhim.com site synced up with my custom-built accounting project. If I used an external site for payments, I’d probably then have to manually add those payments to my accounting system. More effort!
- The third-party site would probably take a cut of my sales.
So, given that I am a coder and all, I quickly decided to code my own e-course system. That way it could seamlessly integrate into my existing website, my customers would have their purchase histories all in one place, and the payments could feed into my accounting system automatically.
How did I make my own plugin??
I’m not going to paste all my plugin code here, but I thought it might be fun to give you some insight into how I went about this!
Originally I was going to sell this e-course plugin on Creative Whim, so instead of incorporating the functionality into my pre-existing plugin for Creative Whim, I created a new one called CW E-Course. By the time I was done, I realized I wouldn’t really be able to sell the plugin. I had begun to code it too specifically to my own website set-up and I’m not sure it would work well for anyone else. But oh well. 😛
Code makes my eyes bleed, show me pictures!
If you don’t want to read all the techy explanations and code snippets, click the above button to jump down to the screenshot showcase.
First: I created the custom post type
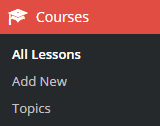
If you don’t know, a custom post type is basically a replica of the WordPress “Post” or “Page” functionality. So if you duplicate pages, you have the exact same functions (set a title, enter in your content, etc.) but you give it a whole new name and a new section in your admin area. I utilized this custom post type functionality to create a new Courses section in my admin panel.
So when I go to create a new lesson, I just go to Courses » Add New, and I type up my lesson very similarly to how you’d type up a post in WordPress.
Custom taxonomy
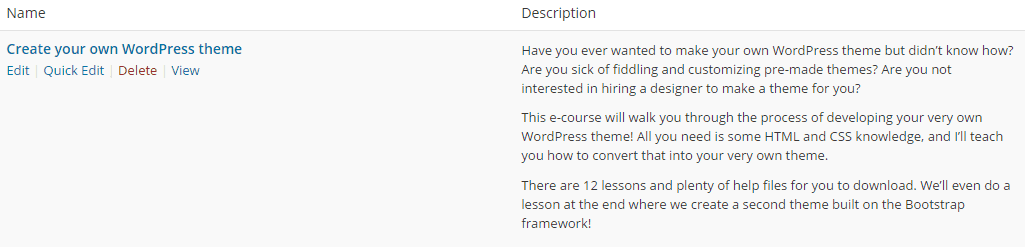
In order to separate my lessons into different e-courses, I then created a custom taxonomy for “Topics”. In WordPress, taxonomies are categories and tags. Just like how you can duplicate “Posts” or “Pages” into custom post types, you can duplicate categories and tags into your own custom taxonomies. If you’ve used the Ultimate Book Blogger Plugin, you’ve probably seen the custom taxonomies for Genres, Publishers, Authors, etc.
Each topic is its own e-course. Right now I only have one: Create your own WordPress theme. So each lesson I create gets assigned to this topic.
Protecting e-course pages
When you create a custom post type, you have access to a few new page templates in WordPress, including:
- Pages that display the individual “posts” (in this case, e-course lessons). The post equivalent would be the page of an individual blog post.
- The archive for all the custom post type entries. So this would be the page that displays an archive of all the lessons. For normal posts, this could be similar to your homepage that lists your recent posts, then has pages to navigate to older ones.
Here’s where things started to get tricky. Obviously I don’t want just anyone to be able to view these lessons. If someone hasn’t bought the e-course, they shouldn’t be able to read the content. I had to make these private.
There are a couple built-in WordPress options for this:
- Set the page to “private”.
- Password protect the pages and give the students the password.
I didn’t like either of those. So I decided to create a custom capability.
Creating a custom capability
In WordPress there are many different capabilities that check to see whether or not a user has permission to do something. Examples include:
- install_themes
- activate_plugins
- moderate_comments
- edit_posts
- publish_posts
- edit_pages
I’m sure you can guess what they mean?
Well I decided to create my own capabilities for reading e-courses! My plugin would check to see whether or not you have permission to view that e-course before letting you see it. To do this, I had to connect to my selling platform: Easy Digital Downloads. That’s a plugin I use for selling all my pre-made themes and plugins.
Connecting into EDD to grant permissions
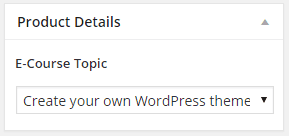
Inside Easy Digital Downloads, I created a new selling category for E-Courses. This is the category I’d place all my e-course products into. Then I created a new custom field for the products where I could select which e-course topic that product corresponded to. So in the image on the right, you can see I’ve selected the “Create your own WordPress theme” topic. This way, the product listing connects to the e-course custom post type topic.
Now for writing the actual code. I had to hook into the edd_complete_purchase action, which gets triggered after a purchase is completed. Then, inside my function, here’s what I wanted to do:
- Scan the user’s “cart” (what they purchased).
- Check to see if one of the purchased items is inside my “E-Course” category. This is how we know they’ve purchased an e-course.
- If so, retrieve the e-course topic this product corresponds to (using the custom field I mentioned before).
- Then get the slug (URL-friendly) of this topic. So for “Make your own WordPress theme” it would be make-your-own-wordpress-theme
- Grant the user a new capability called: view_{slug}, so it would be like view_make-your-own-wordpress-theme
- This means they now have permission to view the course!
Now that you know what I wanted to do, here’s the code I used to achieve that:
add_action( 'edd_complete_purchase', array($this, 'grant_capabilities'));
public function grant_capabilities($payment_id) {
	$payment_meta = get_post_meta($payment_id, '_edd_payment_meta', true);
	$user_info = $payment_meta['user_info'];
	$cart_details = $payment_meta['cart_details'];
	$product_ids = array();

	if ($cart_details && is_array($cart_details)) {
		foreach ($cart_details as $item) {
			$product_ids[] = $item['id'];
		}

		if ($product_ids && count($product_ids)) {
			foreach($product_ids as $id) {
				$obj = get_post($id);
				// Make sure it's in the e-courses download category
				if (has_term('e-courses', 'download_category', $obj)) {
					$topic = get_field('ecourse_topic', $id);
					// If the user is logged in, grant them the capability
					if (!empty($topic) && $user_info['id'] != 0) {
						$capability = $topic->slug;
						$user = new WP_User($user_info['id']);
						if ($user && $user != false) {
							// Grant them the capapbility
							$user->add_cap('view_' . $capability);
							// Email the user
							$this->send_welcome_email($user, $topic);

							// Add them to the course mailing list
							$this->add_to_mailing_list($user, $topic);
						}
					}
				}
			}
		}
	}
}
But what if I want to check, remove, or grant permissions manually?
I probably won’t need to do this in most cases, but it would always be useful to be able to check and modify these permissions manually. For example, what if someone cancels their registration for the e-course? I’d want to remove their permission.
In order to do this, I created custom profile fields in WordPress. When I edit a user, I can check to see if they have permission and grant/ungrant permissions if necessary. Here’s what it looks like when I edit a user’s profile in the admin area:
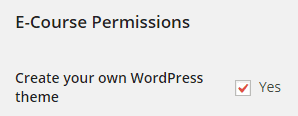
Each e-course topic has its own entry and checkbox. And this is easily achieved using a small amount of code:
<?php
/*
 * Display custom profile field
 */
public function show_profile_field($user) {
	$topics = get_terms('course-topics', array('hide_empty' => false));
	if ($topics && is_array($topics)) {
		?>
		<hr>
		<h3>E-Course Permissions</h3>

		<table class="form-table">
			<?php foreach ($topics as $topic) : ?>
				<tr>
					<th><label for="course_<?php echo $topic->slug; ?>"><?php echo $topic->name; ?></label></th>
					<td>
						<?php
						$checked = '';
						if (user_can($user, 'view_' . $topic->slug)) {
							$checked = 'checked';
						}
						?>
						<input type="checkbox" name="course_<?php echo $topic->slug; ?>" id="course_<?php echo $topic->slug; ?>" value="yes" <?php echo $checked; ?>> Yes
					</td>
				</tr>
			<?php endforeach; ?>
		</table>
		<hr>
		<?php
	}
}

/*
 * Save custom profile field
 */
public function save_profile_field($user_id) {
	if (!current_user_can('edit_user', $user_id)) {
		return false;
	}
	$user = new WP_User($user_id);
	$topics = get_terms('course-topics', array('hide_empty' => false));
	if ($topics && is_array($topics)) {
		foreach ($topics as $topic) {
			$setting = $_POST['course_' . $topic->slug];
			// They are given permission
			if ($setting == 'yes' && !user_can($user, 'view_' . $topic->slug)) {
				$user->add_cap('view_' . $topic->slug);
			}
			// No permission
			elseif ($setting != 'yes' && user_can($user, 'view_' . $topic->slug)) {
				$user->remove_cap('view_' . $topic->slug);
			}
		}
	}
}
?>
I have one function for displaying the profile fields on the admin page, then another function for saving the values.
How do you check these permissions on the template files?
Then on each template file for the e-course (the archive and individual lesson pages), I can check to see if the current user has permission to view this page or not. This is easily done with a built-in WordPress function:
if (current_user_can('view_make-your-own-wordpress-theme')) {
    // They have permission!
}
else {
    // They do not have permission
}
Here’s how I actually implemented it:
/*
 * Filter post content
 */
public function filter_content($content) {
	global $post;
	if (get_post_type($post) != 'ecourse') {
		return $content;
	}

	// If the user isn't logged in, display the login form
	if (!is_user_logged_in()) {
		return '<div class="alert alert-warning text-center">You must be logged in to read your e-course material.</div>' . do_shortcode('[cwloginform redirect="' . get_permalink($post) . '"]');
	}

	// If the user doesn't have permission, show an error
	$permission = $this->check_permission($post);
	if ($permission != true) {
		return '<div class="alert alert-danger text-center">You do not have permission to view this course.</div>';
	}

	return $content;
}

/*
 * Check if a user has permission to view an ecourse
 */
public function check_permission($post) {
	$topics = wp_get_post_terms($post->ID, 'course-topics');
	if ($topics && is_array($topics)) {
		foreach ($topics as $topic) {
			if (!current_user_can('view_' . $topic->slug) && !current_user_can('manage_options')) {
				return false;
			}
		}
	}
	return true;
}
So in my first function (which hooks into the the_content filter), I actually modify the content of the lessons. If the user isn’t logged in or doesn’t have permission, they don’t get to see the content ($content) of the lesson at all. They have to pass the permission check first!
However, this only applies to the ecourse post type. If the post type isn’t “ecourse”, then I return the content straight away so the person can see it. 🙂
Automatically add customers to a mailing list
So you may have noticed a line of code in the snippet for adding permissions:
// Add them to the course mailing list
$this->add_to_mailing_list($user, $topic);
This line triggers a function I wrote called add_to_mailing_list($user, $topic). This function is for automatically adding that customer to a mailing list for that e-course. This is so I can all the course participants a reminder when the course begins. Luckily this was very easy for me to do since I also coded my own newsletter plugin, so I knew exactly how to add a new subscriber.
I have a separate mailing list for each e-course and the customer only gets added to the list for the e-course they signed up for.
Screenshot Showcase
Here are a few screenshots of my e-course system in action!
The course ‘archive’ page
Logged Out
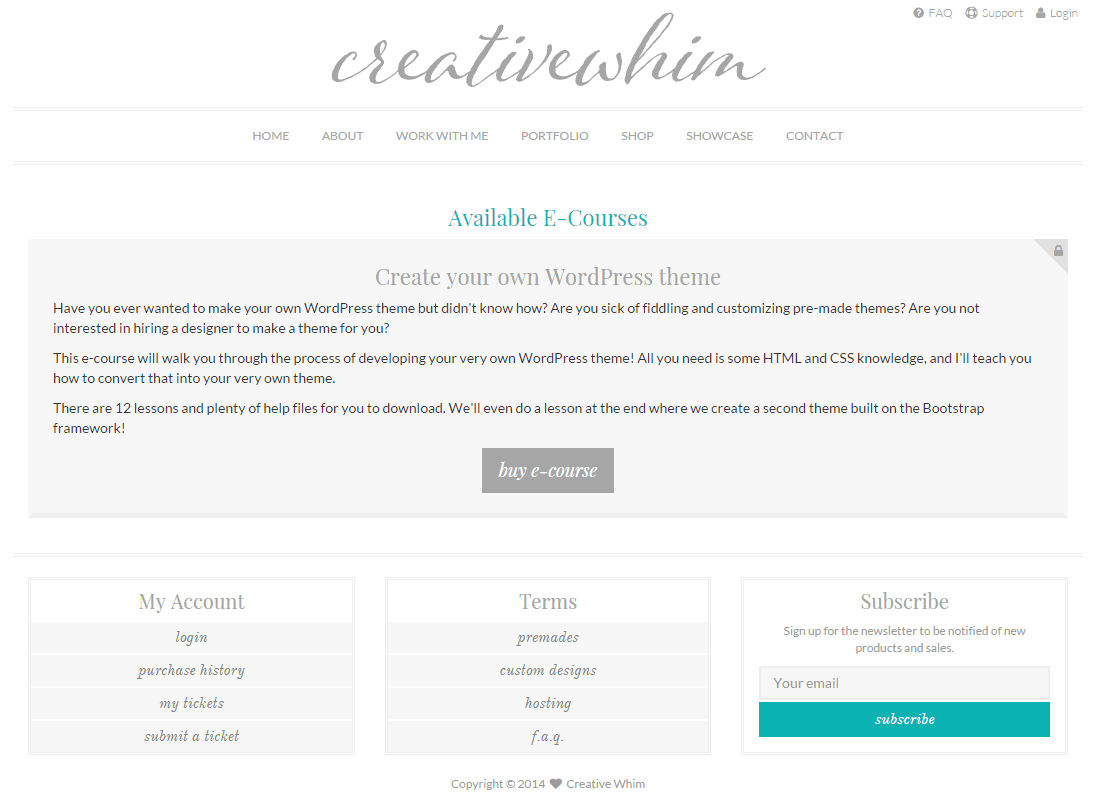
Logged Out
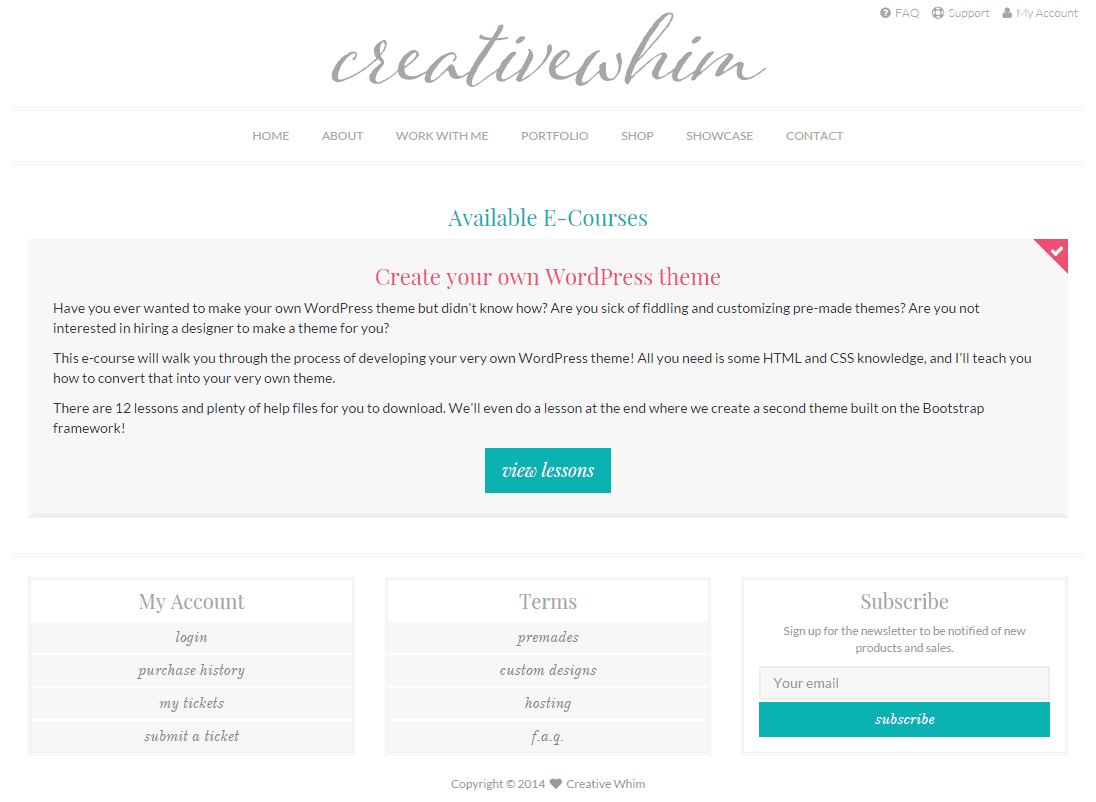
When a customer is logged out or hasn’t purchased the e-course, they see the “locked” version. Instead of being given a link to the lessons, they’re given a link to the course purchase page.
Lesson progress
When a student views a lesson, they have a bar that keeps track of their progress. In this case, only one lesson (“Introduction”) has been released. The others are scheduled for future release, so they’re locked and greyed out. But you can still see the names.

Topic custom fields
I added a few custom fields to the topics.
- The “Purchase Link” gets used on the course archive page when a user doesn’t have permission to view the course. I use this to connect a course topic to its listing.
- The “Course Start Date” gets used in the welcome email so I can dynamically specify when the course will begin.

Now let’s see if this actually works…
Of course I’ve tested this rigorously. I’ve done test purchases to make sure the permissions get applied, I had my husband go through the whole purchase process (checkout, receive instruction/welcome emails, view courses, navigate through lessons, etc.) but I haven’t actually gone through this with real customers yet!
Well, since my e-course is officially open for registration, we’ll see how user-friendly people find it. 🙂
I have absolutely no idea what any of this means, but I’m impressed 😀 Someday I’d like to figure learn about this stuff, (and my husband is really pushing for me to learn HTML, build my own site etc-he’s a programmer). If that ever happens, I definitely know where to go for instruction (you, not him-he just drives me nuts lol).
Haha yeah I suppose it’s a bit complex. 🙂 I guess the main reason I posted it is because I’m quite proud of what I accomplished and I felt like I had to tell someone lol!
It would be great to learn HTML and such. 🙂 It’s useful even for small blogging things.
Very excited to get started on this! I am grateful that a member of our community is talented enough to do all that you do. I’d be too intimidated to try this with anyone else. 🙂 So thanks!
I’m excited too! 😀 People have been suggesting I do classes for aaages and it’s awesome to finally get moving on that!
I can’t wait to see what else you decide to teach! I’ll be right there to learn it though!
i would love to be part one day but i think i have to study first html for dummies XD because i don’t know nothing and i would love to the tricks with codes you do and create a plugin XD