
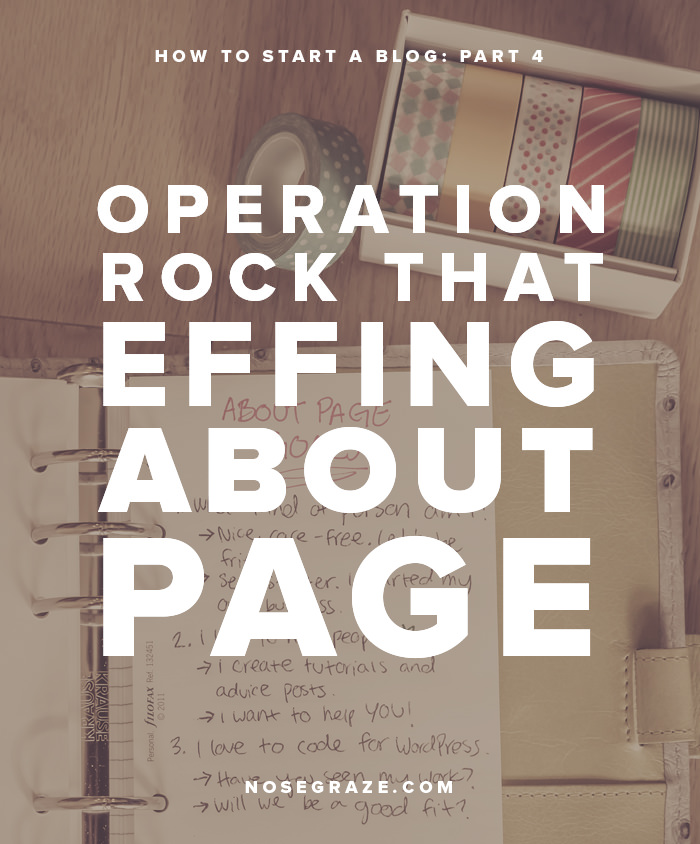
It’s time for part four of the how to start a blog series. And as you can see from the below question, many people—even established bloggers—want to know the ins and outs of creating a perfect about page! So whether you’re starting a new blog or just tweaking your existing one, this is a post worth reading!
Hi!
I was wondering if you have any tips for writing the ‘About Me’
How long should it be? what type of info should be included? what should NOT be included?
Thanks!
Megan
Hi Megan! I’m going to help you rock the hell out of your about page.
New blogger? Write your about page NOW!
If you’ve been following along in the series, you’ll remember that we left off on choosing a blog name. We haven’t even picked a platform or set up the actual blog yet! So why are we already writing the about page? Because I believe that writing your about page can help you shape and focus your blog. And that’s a useful thing to do before you settle on a name (buy your domain) or set up the actual blog.
Writing an about page is all about picking your target audience and talking directly to them. I know what you’re thinking, “But isn’t the about page all about ME?” No, it’s not. Your about page is just as much about your readers as it is about you!
I’ll help you whip your about page into shape
Here are the four areas we’re going to be focusing on today:
- Goals for your page.
- What to include on your page.
- Taking a photo.
- Setting up an action step.
Let’s rock this!
Step #1: Your goals
Think about your readers. They click on your about page and what do you want them to learn? I think there are the two obvious goals:
- More about me as a person
- About the blog and how/why I started it
But let’s dig a little deeper. To be most effective, your about page should have an objective. Maybe you want to convert the reader into a customer (you want to sell them something), or maybe you want them to subscribe to your blog, or maybe you want them to think that you’re an awesome person and become your new BFF.
I thought about this for my blog and Nose Graze. Nose Graze is my blog, but I’m also a business owner. I wanted to tie that into my about page. I wanted to make sure the reader walked away knowing:
- I’m a nice, care-free person.
- I’m a self-motivator. I love creating new projects and blog posts.
- I love helping people, and I want to help YOU specifically.
- I help people by sharing my knowledge, posting tutorials, creating free plugins and code snippets.
- I’m also a business owner. I spend time creating products that I think my readers will love. I like to save people time and money.
Now it’s your turn. Grab a piece of paper and write down your goals. What do you want your readers to think about YOU? What do you want your readers to DO after visiting your about page?
Once you have your goals you can write with intent. That means crafting your about page with those goals specifically in mind. That’s the key to creating a successful page.
Step #2: What to include on your page
You have to begin with something AWESOME.
If you’ve been to high school, you’ve probably had your English teacher drill into you the importance of your “thesis statement” or “opening sentence”. I know I did.
It’s no different with your about page. That first line or heading is EXTREMELY important. That’s what’s going to make someone keep reading or x out. I believe there are two routes you can go:
- Say something quirky/unique about yourself. This has to be REALLY different. Not just, “Hi, I’m Ashley and I’m a girl from England.” Boooring. If you’re going to make it all about you, it has to be really different and something that won’t be applicable to every other person in the world. I’m thinking more like, “My pink hair and I are on a journey around the world.” See what I mean? That’s like a, WTF kind of opener, but in a good way.
- Let the reader know that you can do something for them. This is key. And I think you’ll often want to go this route rather than #1. Straight away you want to bring the reader into the equation. This isn’t about why you’re awesome, but it’s about how you can use your awesomeness to help your readers. As an example: “I’m a badass blogger who helps strong, creative women take their businesses to new heights.” In that sentence I’ve told you what I am (“badass blogger”), who I help (“strong, creative women”), and what I do for them (“take their businesses to new heights”).
How to write your opening statement.
This is not meant to be quick and easy. This is something you want to spend time on and go through drafts. You’ll want to write down all your ideas, cross out the rejects, and constantly tweak your options until you find one that’s just right.
- First, think about what you do on your blog or website. What are your posts about? Do you help people solve problems? What kind of problems? Do you write book reviews? What’s so great about them? Find out what exactly you do. If you haven’t started your blog yet, think about what you WANT to write about.
- Now, looking back at #1, why should people care? Will your posts help them change the world? Will your tips help them start a business? Will your book reviews help them fall in love with reading again? What do your posts actually do for other people?
- Again, look back through your blog posts. But this time, think about who you’re talking to. Are you talking to an aspiring freelance woman in her mid-20s? Are you talking to a teenage bookworm who hides in the library in high school? Who do your posts relate to? What’s your target audience?
- Very, very briefly, who are you?
Those are the four things you need to get started. From there, it’s just a game of mixing and matching until you find the perfect combination of words. Here are a few examples to get you started:
- I’m a blogging super star who helps creative women power their websites.
- I’m a teenage book worm challenged with the task of giving every young adult their next great read.
- I’m a self starter ready to help you launch your freelance business.
- I help tired, burnt-out nine to fivers start their own businesses and reach financial freedom.
And if we break down one of those, you can see the different pieces come into play:
I’m a blogging super star who helps creative women power their websites
Now ditch that “About” title and replace it with your one-liner!
This is particularly true if you’re editing an existing blog. Get rid of that boring page title called “About”. Yes, we knew it was called “About” from your navigation link, we don’t need to be reminded. So make your epic one-liner front and centre.
If you think your awesome opening statement is too long to fit in the page title spot and doesn’t look right, then reserve that for the first sentence. But still come up with something better than “About” for the title. This short title can just be shorter versions of all the points we highlighted above. For example:
- I Kick Blogging Ass
- Find Your Next Great Read
- Get Ready for Launch Day
- Find Financial Freedom
If you go back and reference my earlier list, you can see that each of those points correspond to the longer one-liners from above, but they’re shortened, “title-friendly” versions.
If you’re a designer, you can even ditch the typical title layout all together. That’s what I did on my about page:
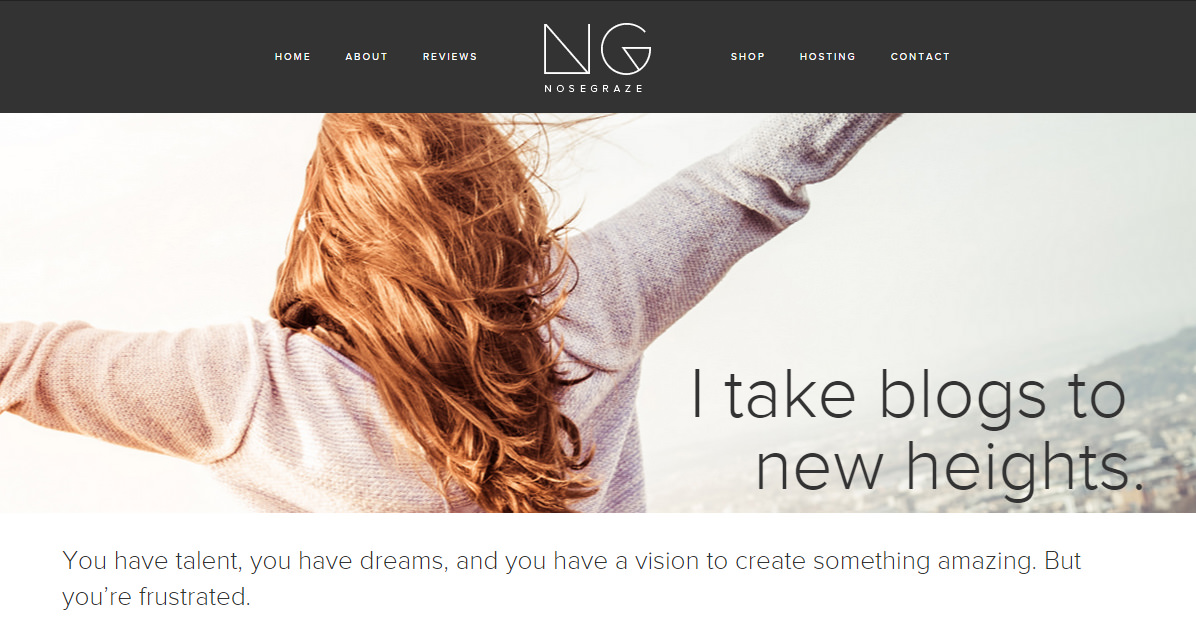
I don’t really have a standard page title anywhere. You could say that “I take blogs to new heights” is my page title, but it’s not in the typical “page title format”, if you know what I mean. And if that’s the approach you want to take, that’s awesome!
Your first paragraphs should be about connecting with your reader.
This is where you should get into the head of your target audience.
- Who are they?
- What do they struggle with?
- What problems do they need solved?
- What do they want?
- What are their dreams?
Those are the things you need to connect with and address. A good way to do that is to create an imaginary person and actually talk to them. So if I decide my target audience is a teenage book reviewer in high school, I’ll actually create that person in my head and write a mini biography for them:
Ali is a 16 year old high school student who loves to read. Her favourite books are cute, sweet, contemporary romances, especially ones that involve country girls and cowboys. She spends her entire lunch hour in the library, walking through the shelves and running her hands along the spines of books. But she has a hard time picking the perfect book out of the thousands of options. She’s overwhelmed with all the choices and often picks books that end up having insta-love, which she HATES! She wants a new reader friend who can tell her which books to avoid (because they have insta-love) and which books have the SWEETEST, knee-weakening romances.
You don’t necessarily have to go into that much detail, but it helps to paint a picture of your ideal reader like that. Then once you have that in your head, you can talk directly do them. Maybe something like:
I read ALL the books so you only have to read the GREAT books.
You have a love for contemporary romances, especially the ones with those cute country girls and the drop-dead gorgeous cowboys. You know, the ones with the sexy cowboy hat and the strong arms from all that manual labour? *swoon* But you have a hard time picking the good books from the bad ones. There are THOUSANDS of books in the library, how do you know which ones are worth reading? Some of those romances make you deliciously weak at the knees, but others suffer from insta-love or an overdose of cheese.
I totally get where you’re coming from, which is why I want to help you out.
Contemporary romance books are my universe. Last year I read 89 of them! Isn’t that nuts? So I’ve gotten pretty good at picking and choosing books that rock my world and turn my eyes into little love hearts. I want you to know exactly which books those are, which is why I started my blog.
Each week I post three book reviews I’ll tell you about which books rocked, which sucked, which made me cry, and which made me jump up and down with laughter and excitement. I’ll give you all the deets, so you can decide if it’s a book that you’ll fall in love with too!
That could still use more refining and editing, but it’s not too shabby for a first draft. When I wrote that I imagined I was talking directly to that Ali girl I invented earlier. Instead of just talking about myself, I brought her into the conversation.
You want your readers to feel like they’re part of your blog and they have a place here too. Blogs go two ways: there’s the author and there’s the reader. Both of them are important, so the about page should reflect that.
Then you can transition into how awesome you are.
Once you’ve convinced your reader that you should be BFFs, it’s time to actually tell them a bit more about you. If you put this part first, you run the risk of boring your readers or making them wonder why they should care. But if they’ve already connected with you and realized that they fit into your target audience PERFECTLY, they’ll be dying to know more about you!
This is where you can say things like:
- How old you are
- Where you live (no actual addresses though, please 😉 )
- What you like to do in your free time
- Are you in school? Do you work? Elaborate.
- What’s important to you?
Do not use third person and do not be too formal. Pretend like you’re talking to Ali again. You’re chatting with a friend and sharing your story. This should be conversational and relatable. Make sure you really bring your personality and voice into it. If you’re a funny person, BE FUNNY. If you’re an awkward person, BE AWKWARD.
One thing that helps is to tell a story. On my about page, I briefly tell my love story with my husband. I describe how I’m an American girl who fell in love with a Brit so I moved to England. It’s kind of a sweet, romantic story, and I also think it’s pretty unique and interesting. If you have a fun story like that, tell it!
This is all about you. Own it.
Step #3: Taking a perfect photo
Your about page NEEDS at least one photo, if not more. I have two!
Sure you can use words to describe yourself and connect with your reader, but a photo will be even more powerful. When I read an about page, I want to SEE the person behind it. I want to visualize who I’m talking to.
So now we’re going to look at the difference between a bad photo and a great photo, and talk about how to achieve the latter.
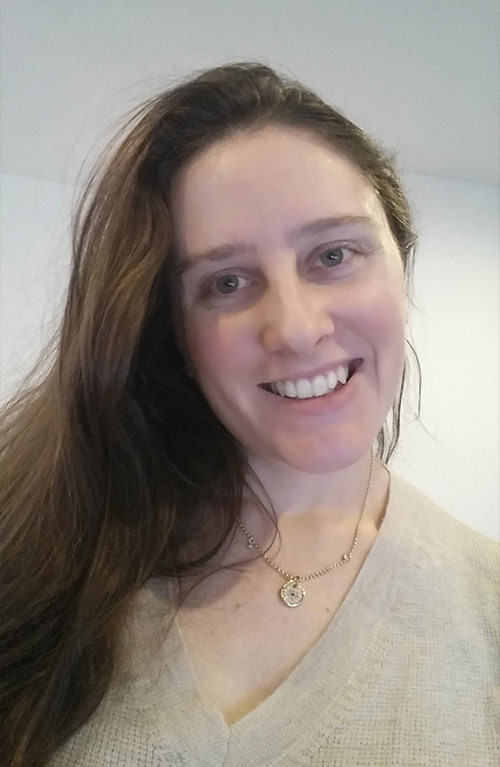
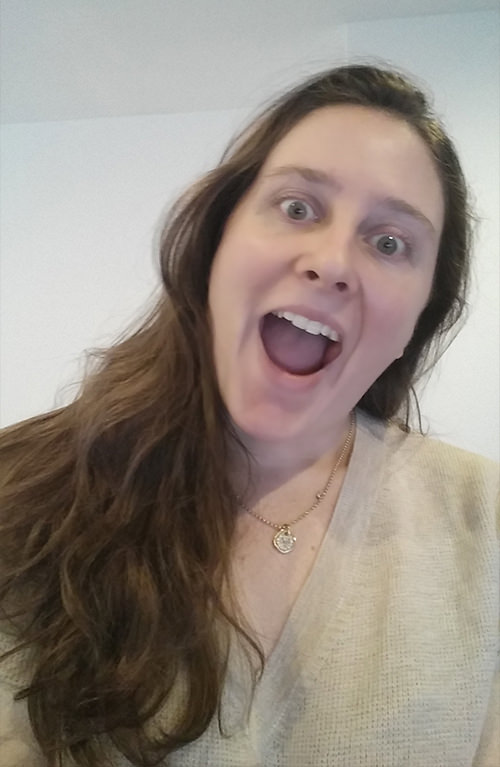
The not-so-great photo: dark, poor quality, can barely make out your face!
I’ve seen a lot of photos taken in a dimly-lit room with a cell phone camera. I understand not everyone has a DSLR, but if you must use a cell phone camera at least do yourself a favour by going outside where there’s better lighting! You want your photo to be well lit and clear.
Here are a few examples of BAD photos I took in a dark room with my cell phone. See how bad the quality is?
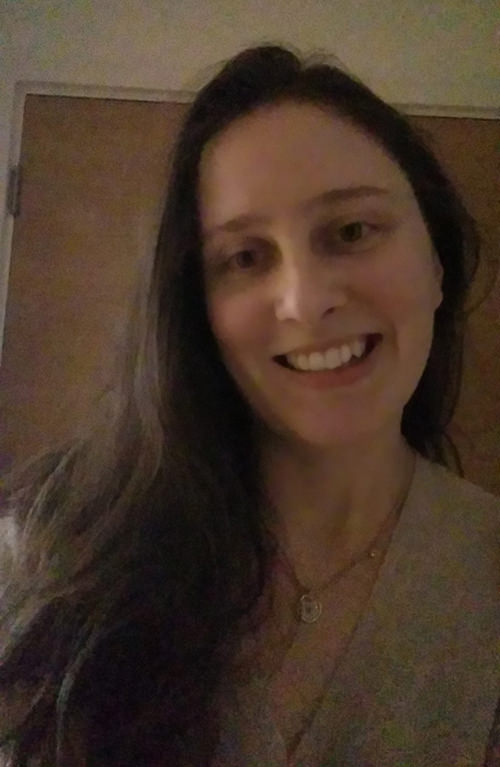
Even if you only have a camera phone, you can do better. Those actually look like frames from a webcam chat or something. Ugh.
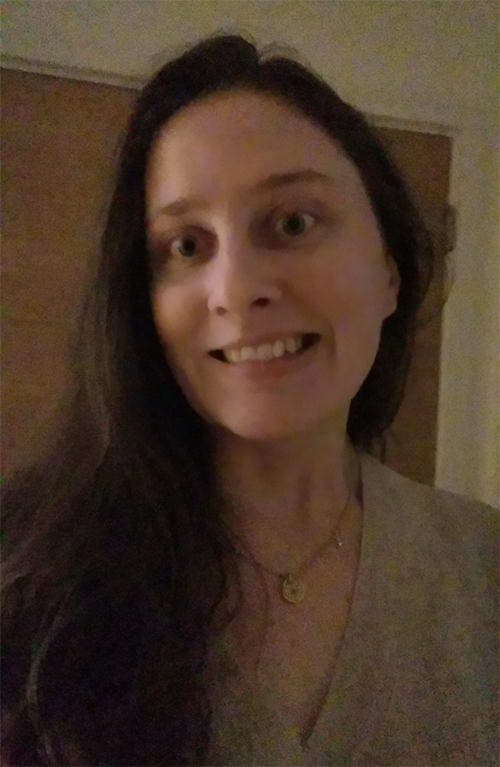
Slightly better photos, but still not fab.
Then I took two more photos. These are better, but honestly still not great. They were still taken inside and with a camera phone, but I moved next to a window. This massively improved the lighting! The quality still isn’t great and the white background is a bit dull, but this is a better option if you’re determined to not take things outside!
Pretty great photos with a DSLR
I know not everyone has a DSLR but I wanted to show you what some better photos would look like. These are taken in the same room as the “slightly better” ones from before, but with a DSLR. They’re much clearer and feel like more professional photos.
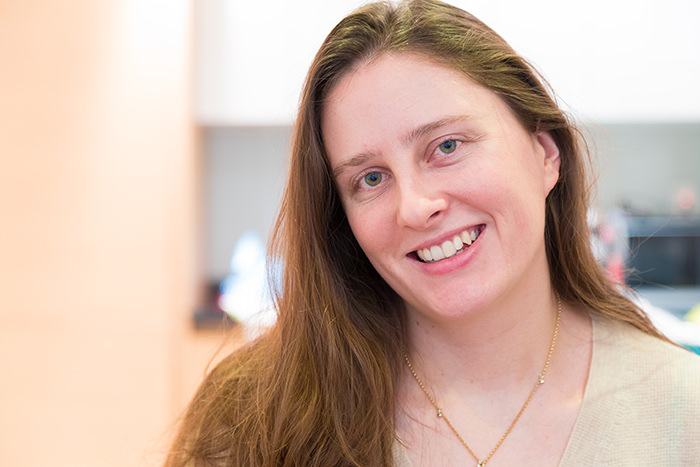
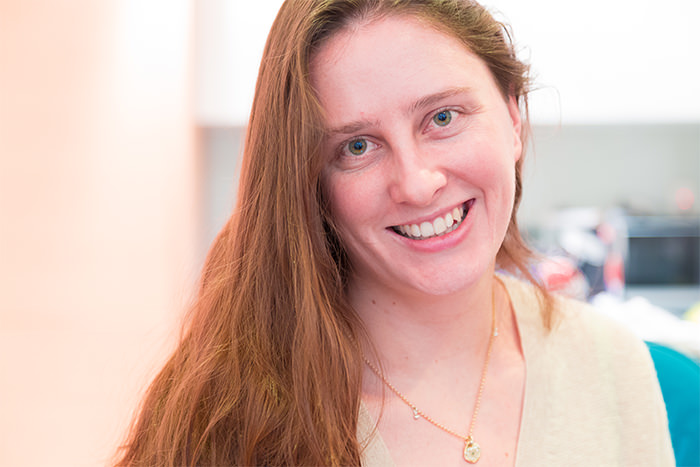
I’m in the EXACT same spot as before, but the DSLR handles the lighting and quality a million times better! Now these are photos I’d put on my about page!
I took these with a DSLR and a tripod, and then took the actual photo with my smartphone (my phone was connected to my DSLR so I could sit in my chair and use my phone to actually trigger the camera).
If you don’t have a DSLR, then my #1 piece of advice would be to take your smartphone outside. That’s where you’ll get the best quality.
As long as your face is clearly visible, I don’t really think there are a ton of rules for your photo. Smile and try to let your personality shine through a little. If you’re a bit quirky, be quirky. Throw on a funky outfit and strike a weird pose. If you’re a fashionista, dress up! Put on makeup and model your heart out.
Make it all about YOU.
Step #4: Create an action step
This is the best part! The last thing you want to do on your about page is give the reader something to do. This is where you really put your goals and intentions into practice. Remember what your original goal was from step #1? Maybe you wanted to sell a product or get more email subscribers, or convince the reader that you should be BFFs? Well now it’s time to actually get them to do that one thing.
This is called an action step. We want the reader to not just read all about you, but actually DO something.
On my blog, the action step is subscribing to my blog via email. At the bottom of my page, I tell the reader that I want to teach them everything I know. I want to provide them with a goldmine of information, including blogging tips and tutorials. Then I have an opt-in form for my blog that they can fill out.
That form is what the whole page led up to.
- I connected with my reader.
- I made them want to get to know me.
- Then I actually told them about myself.
- I talked about how awesome my blog is and how I can’t wait for them to get in on this awesomeness.
- Then I gave them a chance to actually be part of it, via my opt-in form.
Your action step could be an opt in form, or a link to buy your ebook, or a button to follow you on Goodreads, or something else. You just need to give the reader something to do. This is what your whole page has been building up for!
Things to remember when writing your about page.
Okay we’ve been through A LOT of content. Let’s wrap things up with just a few general pointers and reminders:
- Write conversationally. Don’t be too formal or proper. Do not write in third person. Write as if you’re talking to a friend.
- Engage your reader. Bring them into the conversation and make them feel important.
- Convey to your reader what you can do for them. Why should they care? Why should they read your blog?
- Spend time taking a good, high quality photo. Use a DSLR if you have one. If not, take it outside where there’s plenty of good lighting (but not TOO bright! Sometimes it’s best to go outside but stay in the shade).
Why it was an awesome idea to write your about page before launching your blog.
If you’re starting a brand new blog, I want to remind you why I decided to write this post before the “how to pick a platform and set up your blog” post. By writing your about page now, you:
- Found the PURPOSE of your blog.
- Defined your TARGET AUDIENCE.
- Figured out WHAT YOU DO for your audience.
Congratulations: you basically just wrote a blogging manifesto before starting your blog. This helps solidify your focus and keep you on track.
I challenge you to tackle your about page!
Spend a few days drafting, reading, and revising. Put plenty of time and effort into crafting the perfect page.
I didn’t write my about page in one sitting. I’d work on it for a while, save it, then take another look the next day. A fresh set of eyes helps! Just keep tweaking it until it sounds perfect.
Coming up next: choose a blogging platform that’s right for you.
I have had my blog for about a year and a half and still haven’t written an about page! I know that I should, it is just one of those things that is hard to do!
Missie @ A Flurry of Ponderings
Sounds like it’s time to get writing! 😀 You’re right though, it is very hard to do.
I’ve made over 25 revisions on my About page; I went a little overboard, haha! It’s decent, but not perfect 😀 Looks like it’s time for me to edit it again!
Wowza!! That’s a ton! If you’re no longer using those old revisions, you should consider deleting them. 😉
Have fun tweaking your page!
Ooooh… this is helpful. I’m going to redo mine. These are amazing posts, Ashley!
Thanks Carrie. 🙂 Good luck with yours!
Thanks so much!! I just revised my about me page using your post to guide me 🙂 Its needed it for a while!
Go you! 🙂 Awesome job!
Hey! What an awesome post. I’m still in the process of creating my blog and was having such a hard time with about page. I’m the kind of person that has the most difficult time when I start writing but then gets easier as I find my groove lol. So your suggestion’s are great. What do you think about picture though? I don’t necessarily want to post my photo but have a character illustration of myself.
I think a picture is better because that’s how I’m going to connect with you most and see you as a person that I can talk to. An illustration might be cool if you’re an artist, but otherwise it feels a bit impersonal.
I really like to be able to SEE a blogger in my head (put a real face to the words) when I read their about page or their blog posts.
If you’re really against it then an illustration is better than nothing, but I do think a real photo would be the best option. 🙂
Awesome! I LOVE your about me page! It’s exciting! It’s very different and NOT in third person. Third person about me pages drives me crazy. It feels too fluffy, foo-foo, and posh. It’s actually a turn off for me. This post is great timing since I have rebranded my blog and took off my old about me info. The about me page has been….under construction. Yeah, it says that there. Lame, I know. :/
I’ve been where you are, Julie! I redid one of my sites a while back and just felt like I couldn’t deal with my about page at the time, so it was there but “Under Construction”. I don’t blame you! About pages are super hard and time consuming to write. But you’ll get there. 🙂
This is great! I’ve never worried much about my blog about me page – but I think I will definitely use this to work on my about page for my author website I’m working on. Thanks for all the tips!
You’re very welcome! 🙂
1. Original text, I think I have it covered (I decided to go with my blogstyle and I wrote a ‘Once upon a time’ fairytale introduction)
2. Good quality picture is on it’s way. I’m treating myself with a new camera.
You have some great tips here, I think I will try to spice up the about me page even more 🙂 *late reaction, I’m finally catching up, haha*
I love this post. My about me info was very plain and boring so after reading this I went in and made some changes. Hopefully it doesn’t scare anyone away 🙂
OMG I just looked at your about page and I was on Neopets too and I started coding at 12 years old! haha! Love this post too! Working on my about page as I write this 🙂
xx Kelly
That’s awesome Kelly! 😀
I have an about me page written but I wrote it knowing that it was only a temporary page. I knew I needed something more I just couldn’t figure out how to write it. Like most of your other posts that I’ve had the chance to read this one has helped me immensely.
Thanks for being kick ass!
You and this post are AWESOME. Seriously pretty sure I’ve never read a blog post about blogging with more chops than yours. Great job!!
Thanks so much Sara! 🙂
Hey Ashley,
Terrific information. I had read a post about profiles but did not really take it in, because I was not sure what to do with them. Not only do I get how to write an about page now, I understand how I can focus my blog. This post is a wealth of information. Thanks for the photo advice as well. I certainly would have kept it to the dark and gloomy room.
Rachel.
This is probably the most helpful About Me post I’ve read (and there have been a lot). One of my goals for 2016 is to grow my blog so starting out the year with a fresh new (and amazing) About Me page is definitely a must! Thanks for the great advice, I actually worked up a first draft while reading and LOVE IT.
I’m so glad you found this useful and that you were able to create a first draft! Go you! *high five*
This was so helpful! I’m working on starting my blog and want to get the important things like the About Page done before going ahead and posting anything.
Had I not bothered to look up how to write a great page, I would have just made it all about me, and probably boring as heck.
Thanks!
Hey Ashley, just wanna let you know how helpful this post is! Thanks girl!
Awesome – you’re so welcome. 🙂
Thanks for this post. I am constantly feeling like my About page could use improvement, so your post was very helpful.
Great post! So helpful!
I didn’t read the whole post. So sorry, instead I went to your about page. And OMG, it rocks. I might love you, lol.
Haha thanks Diane! 🙂
Thank you thank you thank you so much for sharing this. I’ve been blogging for a couple of years and this month I’m completely revamping my blog. New themes, new graphics and of course a new about page.
I love the way you go about creating an About page. I’ve taken notes while reading!
This is so helpful.
I have lost count of the number of times I have rewritten my about page(s)
But, this post may well have triggered another one.
I’ve rewritten mine a lot too. 😀
This is such a thorough post, thank you for the amazing insights. I’ll get working on re-writing my company’s about page now!
This was SOOOOOOO helpful! Thank you for laying it all out…with examples!!
This article is so helpful and so detailed! Thanks for all your hard work.
Definitely redoing mine now lol…thank you so much for the tips! 🙂 I also may retake my photo since I do own a tripod and a gorgeous full-framed DSLR camera!